Nuitka打包
--by DeadWood8
打包环境
OS: Windows11Python: 3.8.10rapidocr_onnxruntime: 1.2.0nuitka: 1.5.3onnxruntime: 1.14.0
打包步骤
- 安装
Nuitka注:第一次安装会自动下载mingw和ccache,也可以手动配置,自行某度。 -
修改
rapidocr-onnxruntime源码(修改后可以将所有依赖打包进文件) !!! noterapidocr_onnxruntime>=1.2.8以后不用再手动修改下面代码,已经做了修改。可以跳过该步。" -
进入
rapidocr-onnxruntime安装位置,一般在Lib\site-packages\rapidocr_onnxruntime或者你设置的虚拟环境下。 - 用编辑器打开
rapid_ocr_api.py,对39-52行进行修改,如下图: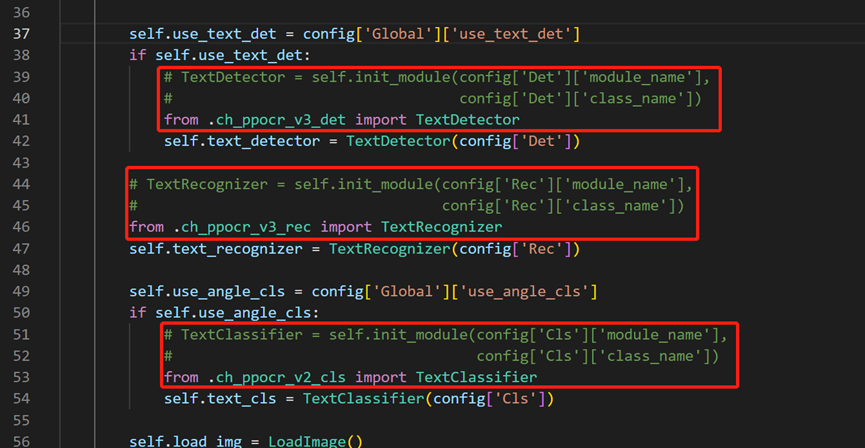
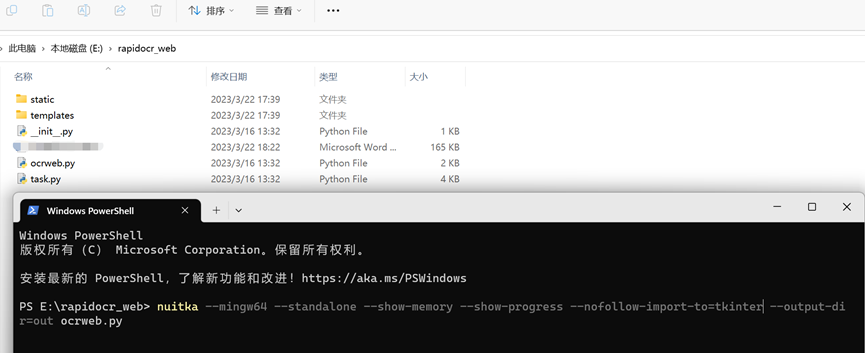
nuitka打包- 如下图所示:
- 拷贝静态文件
- 打包后的文件位于当前位置的
out\ocrweb.dist目录下,需要将web项目和rapidocr-onnxruntime相关文件拷贝到此目录。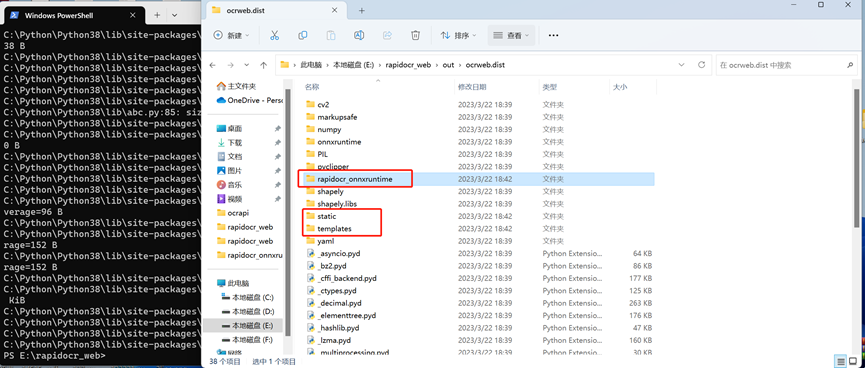
- 拷贝
rapidocr_web目录static和templates两个文件夹全部拷贝到out\ocrweb.dist下 - 在
out\ocrweb.dist创建rapidocr_onnxruntime文件夹,将Lib\site-packages\rapidocr_onnxruntime目录下的config.yaml和models文件夹拷贝到out\ocrweb.dist\rapidocr_onnxruntime文件夹内
- 打包后的文件位于当前位置的
- 运行程序。进入
out\ocrweb.dist,直接双击ocrweb.exe运行。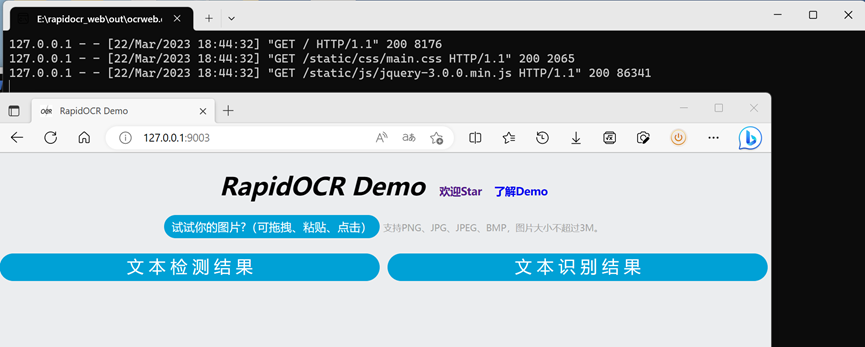
- 打包好的exe下载:百度网盘 | Google Drive | Gitee
补充
- 如果不想运行程序后有黑框,可以在打包命令中加入以下参数
--windows-disable-console - 完整命令为: